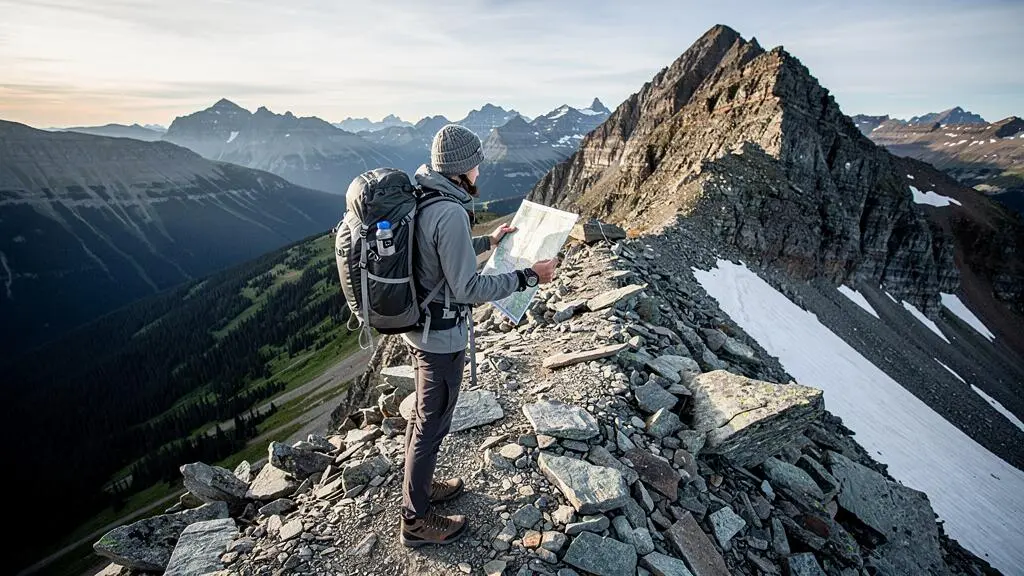
A Canadian mountain summit can look manageable on a hiking app and become exhausting long before the final ridge. A short route may gain substantial elevation, cross loose rock, or climb into weather that bears little resemblance to conditions at the trailhead.
For travellers visiting the Canadian Rockies or British Columbia’s coastal mountains, the safest peak is not necessarily the shortest or the most popular. It is the one whose elevation gain, terrain, exposure and return journey fit the abilities of the entire group under the conditions expected that day.
Start by separating fitness from mountain experience. Being comfortable running, cycling or walking long distances does not automatically prepare someone for steep descents, route-finding above the treeline or the consequences of a changing forecast.
A realistic summit plan therefore includes four decisions before departure: whether the route matches your ability, when you must turn around, whether the terrain requires additional expertise, and what alternative objective remains worthwhile if conditions deteriorate.
Choosing a Canadian mountain hike safely
- Evaluate the complete route: round-trip distance, elevation gain, summit altitude, terrain difficulty and descent demands.
- Set a firm turnaround time using daylight, weather, your group’s actual pace and a realistic descent allowance.
- Prefer established hiking trails in suitable conditions; choose instruction or professional guiding before attempting unfamiliar exposed scrambling or avalanche terrain.
- Why Do Canadian Mountain Hikes Feel Harder Than the Distance Suggests?
- How to Plan a Peak Attempt in Canada With a Turnaround Time You Actually Follow?
- Should You Book a Guided Summit or Go Solo on Canadian Peaks?
- The Packing Mistake That Turns a Cool Mountain Day Into a Hypothermia Risk
- When Should You Try a Canadian Peak to Avoid Snowfields and Avalanche Terrain?
- Which Summer Trail Type Is Better in Canada: Forest Shade or Alpine Views?
- How to Choose the Right Level of Canadian Wilderness If You’re Not an Expert Camper?
- How to Experience the Canadian Rockies Without Losing Half Your Day to Parking?
Why Do Canadian Mountain Hikes Feel Harder Than the Distance Suggests?
Canadian mountain hikes often feel harder than their distance suggests because climbing, altitude, rough terrain and the descent all add demands that kilometres alone cannot describe. A relatively short summit route can require sustained uphill effort, careful movement over unstable surfaces and enough remaining strength to descend safely. Compare the complete route rather than its distance or difficulty label alone.
Elevation gain is the first number to examine. A route gaining 900 metres over several kilometres presents a different physical challenge from a mostly level trail of similar length. Steep sections require sustained muscular effort, while repeated steps over rocks and roots can slow progress even for a fit walker.
Summit altitude matters too. Atmospheric pressure and the amount of oxygen available per breath decrease progressively as elevation increases. In Banff National Park, Parks Canada identifies the treeline at approximately 2,000 metres in its hiking guidance. This is a local landscape reference, not a physiological threshold or a universal treeline elevation across Canada.
For a practical comparison, use three primary measurements alongside the terrain description:
| Route factor | What to examine | Why it matters |
|---|---|---|
| Round-trip distance | Full ascent and descent, including approach trails | Determines the total distance you must complete |
| Elevation gain | Total climbing and steepness | Indicates sustained uphill effort and muscular demands |
| Summit altitude | Highest elevation and time spent high | Helps anticipate altitude effects and exposed conditions |
| Terrain | Roots, loose rock, stream crossings, snow and scrambling | Changes speed, equipment needs and consequences of mistakes |
This is a comparison framework, not a scientifically validated formula for converting kilometres into an effort score. A trail classified as difficult in one park should not be assumed identical to a similarly labelled trail elsewhere; inspect the underlying route description and current conditions.
The descent deserves particular attention. Tired legs can compromise balance on loose stones or wet roots. Although the supplied evidence does not establish that most hiking incidents happen downhill, descent fatigue is a sound reason to avoid using all your energy reaching the summit.
Before committing, try a continuous uphill training walk with your intended daypack. Being able to maintain a conversational pace without becoming exhausted is a useful informal check, although it does not validate your readiness for technical terrain or high altitude.
According to Parks Canada’s hiking preparation recommendations, beginners may average approximately 2–2.5 kilometres per hour on nature trails. That figure should not be applied automatically to steep summit climbs.
A suitable mountain objective leaves energy in reserve. Once you understand the route’s real physical demands, the next decision is how much time you can safely spend pursuing its summit.
How to Plan a Peak Attempt in Canada With a Turnaround Time You Actually Follow?
Set your turnaround time before leaving the trailhead, based on the latest safe return time rather than how badly you want to reach the summit. Allow for a realistic descent, weather uncertainty, daylight and unexpected delays. If you have not reached the summit by that time, turn around regardless of how close it appears.
A turnaround time is a pre-agreed limit used in mountaineering and increasingly useful for ordinary mountain day hikes. It prevents the summit from becoming the only measure of success.
Work backward from the latest acceptable return time:
- Determine when the group needs to be back at the trailhead, allowing for daylight and any transport restrictions.
- Estimate the descent duration using route conditions and the group’s likely fatigued pace.
- Add an appropriate buffer for navigation, rests and unforeseen delays.
- Subtract descent time and the buffer from the return deadline to establish the summit turnaround time.
- Calculate a departure time that allows enough ascent time without using the safety margin.
Hypothetical example: calculating a summit deadline
Imagine a group that plans to return by 18:00. Its route assessment allows three hours for descending and one additional hour for delays. The resulting turnaround time is 14:00, whether or not the summit has been reached.
If the group is moving more slowly than expected or storm clouds are developing, its actual turnaround should occur earlier. These times illustrate the method and are not recommendations for a particular Canadian mountain.
The difficulty is often psychological. After several hours climbing, hikers may feel that turning back wastes their effort. A confident group member may insist the summit is close, or a short improvement in the weather may encourage another attempt.
Agree on the decision process before anyone becomes invested in reaching the top. Say the turnaround time aloud, set an alarm and nominate someone who will monitor it without pressure to make the summit.
In the Canadian Rockies, summer afternoon thunderstorms can make exposed ridges especially concerning. Shorter daylight later in the season changes the calculation further. Check the mountain forecast, trail reports, closures and avalanche information where relevant before setting out.
Choose a backup destination in advance: perhaps a lower viewpoint, a lake or a pass reached before the difficult final climb. Only select an alternative whose current conditions and terrain are appropriate.
Your five-point summit departure checklist
- Record the route’s round-trip distance, total elevation gain, highest elevation and significant hazards in a trip note.
- Save current official trail conditions, restrictions and the mountain weather forecast for the planned day.
- Write down the departure time, firm turnaround time, intended return time and emergency buffer.
- Identify a safe backup destination and mark its location on your map.
- Share the itinerary, party details and expected check-in time with a trusted contact, and confirm that everyone in the group understands the plan.
A firm clock limit reduces one major source of risk. Whether the route should be attempted independently, however, depends on the terrain and your group’s mountain experience.
Should You Book a Guided Summit or Go Solo on Canadian Peaks?
Book a qualified mountain guide when a summit involves unfamiliar exposed scrambling, technical travel, difficult navigation or consequences beyond your group’s experience. Independent hiking is more appropriate on established non-technical routes with manageable conditions and adequate preparation. If you are unsure, join an organized mountain outing or develop the necessary skills before attempting the peak.
Guided versus solo is not a test of courage. The better decision considers three things: the terrain, the consequences of a mistake and the experience available within the group.
| Route situation | More suitable approach | Reason |
|---|---|---|
| Marked hiking trail, manageable elevation gain, suitable conditions | Prepared group or experienced independent hiker | Navigation and terrain demands may remain within ordinary hiking competence |
| Unfamiliar steep terrain, navigation uncertainty or limited mountain experience | Organized group, skills course or qualified guide | Additional experience helps assess route suitability and decisions |
| Exposed scrambling, rope-dependent sections or technical hazards | Appropriately qualified guide or trained, competent climbing party | Errors can have severe consequences and may require specialist techniques |
Popular summits deserve scrutiny because an approachable trail may lead toward a much more serious final ridge. A path can remain relatively straightforward for hours before encountering loose rock, steep drops or a scramble that requires sustained use of the hands.
Reaching such terrain does not obligate you to continue. If the next section exceeds your skills, turn around while retreat remains straightforward. Carrying a rope without training does not make an exposed scramble safe.
Professional guides contribute more than companionship. Depending on their qualifications and the trip, they may provide terrain assessment, technical systems, local weather judgment, route selection and complex logistics. Rope use and technical protection must match the actual hazards and be performed by competent professionals.
Check a guide’s relevant training, qualifications, insurance and authorization to operate in the intended area. Requirements vary by jurisdiction, operator and activity; they should not be assumed identical throughout Canada.
The intermediate option is particularly useful for travellers who are fit but lack mountain judgment. An appropriate outing with a mountaineering club, a guided skills course or a structured group hike can provide practice in navigation, pacing and retreat decisions before attempting more ambitious peaks independently.
Parks Canada’s national hiking guidance discourages solo travel except for experienced hikers or people using easier, well-used routes. Even popular trails may have unreliable cellular coverage, and emergency assistance can be delayed.
The right support should match the consequences of a mistake, not the prestige of the peak. Even on a straightforward trail, however, equipment and clothing can determine how manageable an unexpected delay becomes.
The Packing Mistake That Turns a Cool Mountain Day Into a Hypothermia Risk
The most dangerous packing mistake on a cool Canadian mountain day is relying on clothing that is suitable while moving but inadequate when wet, windy or stationary. Sweat-damp garments can accelerate heat loss during a summit stop or unexpected delay. Carry dry insulation and accessible rain and wind protection even when the trailhead feels warm.
During a steep ascent, your body produces heat and perspiration. A light base layer may feel comfortable while climbing through sheltered forest, but conditions can change rapidly after you emerge onto an exposed ridge.
If you stop moving, your heat production falls. Wind and wet clothing can then increase heat loss. Prolonged rain can create similar difficulties without dramatically cold air temperatures.
Hypothermia is a medical emergency that can occur above freezing, especially when someone is wet, exposed and unable to maintain body temperature. Confusion, unusual behaviour, impaired coordination and persistent shivering are warning signs; severe hypothermia may occur without obvious shivering.
Use a flexible three-layer clothing system:
- Moisture-managing base layer: synthetic fabric or wool that helps move perspiration away from the skin. Avoid cotton as the principal mountain layer because it retains moisture.
- Insulating layer: fleece or an appropriately selected insulated jacket, protected from moisture and readily available for breaks.
- Weatherproof outer shell: a wind-resistant, waterproof jacket suitable for the expected conditions, accessible without emptying the pack.
The system only works if you manage it actively. Remove or vent layers before overheating, protect spare insulation in a waterproof bag and put on additional clothing before becoming chilled. Do not wait until your hands are too cold to manipulate zippers.
Remember that you are packing for the coldest credible conditions on the route, not the temperature beside your vehicle. A sunny trailhead, hot ascent, windy summit and cold descent can occur during the same outing.
Food and water are equally important. Maintaining sufficient energy and hydration helps sustain physical effort and normal heat production. Parks Canada’s general preparation advice suggests approximately 0.5 litres of water per hour, but individual requirements depend on conditions and exertion; safe water availability also matters.
Carry high-energy snacks, additional food, a headlamp, navigation tools and equipment appropriate to the possibility of being delayed. If a hiker develops signs of hypothermia, seek emergency assistance, shelter them from wind and precipitation, replace wet clothing when feasible and prevent further heat loss. Do not force oral fluids into someone who is confused or unable to swallow safely.
Preparation for changing weather makes a summer hike more resilient, but clothing alone cannot compensate for snowfields or avalanche exposure beyond your training.
When Should You Try a Canadian Peak to Avoid Snowfields and Avalanche Terrain?
For ordinary hiking without snow-travel or avalanche training, choose a Canadian peak only after current reports indicate that the intended route is suitable for your abilities and equipment. In Banff, July through mid-September is generally a favourable alpine hiking period, but snow can persist longer. The safest date depends on the mountain, elevation, aspect and conditions that year.
Snow disappears from valleys before it disappears from many mountain passes and shaded slopes. A trailhead may be completely dry while the final ascent remains covered by hard snow or concealed beneath unstable patches.
According to Parks Canada’s Banff hiking information, many alpine passes remain snowbound until late June, and most are generally snow-free by mid-July. Those are broad observations for Banff, not guarantees for a particular route or other Canadian mountain regions.
July to mid-September
The generally favourable alpine hiking window identified in Banff National Park’s guidance. Individual routes may still have snow, closures or hazardous weather.
Parks Canada — Banff National Park hiking guidance.
It is essential to distinguish residual snow from avalanche terrain. A lingering snowfield across a hiking trail can create a serious sliding hazard or conceal the route, even if avalanche danger is not the primary concern. A fall on steep, firm snow can be impossible to arrest without the appropriate skills and equipment.
Avalanche terrain presents a different risk: snow can release on a slope and travel into terrain below, exposing people even where they are not standing on the starting slope. Assessing this hazard requires relevant training, current forecasts, terrain knowledge and appropriate rescue equipment where avalanche exposure exists.
Do not assume that trekking poles, ordinary hiking boots or traction accessories make steep snow crossings safe. Technical snow travel requires judgment and techniques that cannot be replaced by a packing checklist.
Late-season snow also changes during the day. Firm morning surfaces may soften as temperatures rise, potentially increasing sinking, instability or snow-related hazards. Conditions differ by snowpack and weather; an early start does not automatically make a crossing safe.
Before selecting a peak, check the applicable Avalanche Canada or Parks Canada avalanche information where available, official trail-condition reports, weather forecasts and recent observations. Recent photographs can add context but do not replace an authoritative hazard assessment.
A staged seasonal approach is more sensible than insisting on the same summit throughout the year. Begin with lower-elevation established trails that are confirmed suitable, then consider higher objectives as actual conditions permit. South-facing routes may clear earlier, but aspect alone cannot establish safety.
Once you have identified routes that are appropriate for the season, consider how much time they spend in sheltered forest versus exposed alpine terrain.
Which Summer Trail Type Is Better in Canada: Forest Shade or Alpine Views?
Forest trails generally provide more shade and some shelter from wind, while alpine routes offer wider views but greater exposure to sun, weather and difficult terrain. Neither is automatically safer. For a summer summit hike, a combination of forest approach and alpine viewpoint often provides a useful balance, provided the exposed section suits the forecast and your experience.
In the Canadian Rockies, a forested climb may feel physically more comfortable on hot days because trees limit direct sunlight. Roots, wet soil, mud and restricted visibility can nevertheless demand constant attention to footing.
Above the treeline, the rewards change. Open ridges reveal distant peaks, valleys and lakes, but also expose hikers to intense sunlight, wind and potentially dangerous lightning conditions. The absence of trees does not necessarily mean a route is technically difficult, although exposed rock and loose scree can increase the consequences of a mistake.
| Factor | Forested trail | Alpine trail |
|---|---|---|
| Summer sun | Usually more shade | More direct exposure |
| Wind | Often partly sheltered | Frequently more exposed |
| Footing | Roots, mud and wet vegetation | Rock, scree and potentially lingering snow |
| Views | Often intermittent | Usually more expansive |
| Wildlife visibility | Potentially limited by vegetation | Often longer sightlines |
| Lightning exposure | Local hazards remain | Exposed ridges and summits require particular caution |
Wildlife awareness is another meaningful difference. On forested trails, vegetation, bends and running water can reduce the chance of noticing wildlife early. In bear country, follow local bear-safety guidance, stay alert, make your presence known appropriately and carry bear spray where recommended, knowing how to use it.
Open alpine terrain may provide better visibility, but bears and other wildlife can also occur there. Visibility is an advantage, not a reason to abandon normal wildlife precautions.
Timing matters as much as scenery. Where the forecast allows a safe attempt, reaching exposed alpine sections earlier in the day may help avoid some afternoon convective weather. A sheltered forest walk can be a more appropriate later-day option, although evening hiking still requires sufficient daylight and awareness of wildlife.
Read route descriptions for transitions such as forest approach, subalpine meadow, treeline and final ridge. These details help determine when the terrain becomes exposed and whether a turnaround at a lower viewpoint is practical.
The most rewarding route is one where the scenery matches the group’s readiness. For travellers seeking a deeper wilderness experience, the next step is deciding how much remoteness they can responsibly manage.
How to Choose the Right Level of Canadian Wilderness If You’re Not an Expert Camper?
If you are new to Canadian wilderness travel, progress from maintained day hikes to organized overnight trips before considering remote off-trail expeditions. The challenge increases with distance from roads, reduced communication, navigation demands and responsibility for food, shelter and emergencies. A serviced campground can be an excellent base for ambitious day hikes without requiring an unsupported wilderness expedition.
Canadian mountain landscapes can create a misleading impression of accessibility. A destination may look close on a map while demanding extensive travel over steep terrain, with no nearby road or reliable mobile signal.
A practical planning framework has three levels:
- Accessible day hiking: maintained routes reached from an established trailhead, with a planned return on the same day. Cellular reception should never be assumed.
- Planned backcountry overnight travel: established overnight routes where the group must manage camping equipment, food storage, permits, navigation and weather independently.
- Remote or off-trail expeditions: trips requiring substantially greater self-reliance, potentially complicated navigation, limited infrastructure and more demanding emergency planning.
This is an editorial planning framework, not an official Parks Canada classification.
The transition between levels changes your responsibilities. A day hike usually requires carrying sufficient supplies for that outing and foreseeable delays. An overnight trip also demands a shelter system, sleep equipment, food planning, waste management and compliance with the destination’s specific regulations.
For example, Banff National Park’s backcountry camping requirements include mandatory permits and advance reservations for designated overnight camping. At designated campsites, food and attractants must be stored using the provided facilities. Specific random-camping areas have additional bear-resistant container requirements during regulated periods.
These rules are specific to Banff and should not be extended automatically to other national or provincial parks. Check each destination’s booking windows, campsite availability and current food-storage requirements.
Before moving from day hiking to overnight travel, practise pitching a tent in rain, keeping essential equipment dry and preparing food safely. Learn to navigate with a map and compass as well as electronic devices, and test your equipment on a manageable trip before relying on it remotely.
A frontcountry campground with services is a valuable intermediate choice. You can attempt suitable day hikes while retaining established facilities and a more accessible place to sleep. This does not remove the hazards of the day’s mountain route, but it reduces the complexity of overnight travel.
For more demanding backcountry trips, ensure that the group has adequate first-aid ability, emergency communication arrangements and contingency supplies. Banff’s guidance recommends that at least one backcountry group member be trained in wilderness first aid and hazard recognition.
Once the route and wilderness level are realistic, access logistics become the final planning constraint. In the busiest parts of the Rockies, reaching the trailhead on time can be as important as choosing the trail itself.
Key takeaways before planning your trailhead access
- Choose a route with enough daylight and return-time flexibility to absorb transport delays.
- Check official access restrictions before deciding to drive; some popular destinations require shuttles or other authorized transport.
- Treat a missed departure or delayed arrival as a reason to reconsider the hike, not to compress the safety margin.
How to Experience the Canadian Rockies Without Losing Half Your Day to Parking?
To avoid spending valuable hiking time searching for parking in the Canadian Rockies, plan trailhead access before selecting your departure time. Use reserved shuttles or public transport where available, check vehicle restrictions and consider suitable alternative trails. Never assume that arriving early guarantees a space at a popular mountain destination.
High-demand locations such as Lake Louise and Moraine Lake attract more visitors than their immediate parking and access infrastructure can comfortably accommodate. A summit itinerary that depends on securing an uncertain parking space can quickly lose its time buffer.
The first step is determining whether private vehicles can reach the trailhead at all. At Moraine Lake, personal vehicle access is prohibited on Moraine Lake Road. Visitors generally need an authorized transport option rather than a conventional parking plan.
According to Parks Canada’s Lake Louise and Moraine Lake shuttle FAQ, regular park shuttles depart from the Lake Louise Park and Ride at the Lake Louise Ski Resort. The shuttle reservation includes associated Park and Ride parking, transportation to the selected lake, Lake Connector access and return transportation under the applicable arrangements.
For the 2026 operating season, the initial shuttle booking release took place on April 15, with additional seats scheduled for release two days before departure. Those dates describe the 2026 system, whose operating season has ended; future schedules and reservation arrangements must be verified before travelling.
Transport alternatives can include park shuttles, Roam Public Transit and licensed commercial operators, depending on the destination and season. Carpooling can reduce vehicles arriving at a trailhead, but it does not override parking restrictions or guarantee availability.
There is no reliable universal arrival time that secures parking at every Canadian Rockies trailhead. Estimate access needs from the specific site’s current rules, expected demand, travel schedule and the duration of your intended hike.
For shuttle-accessed hikes, account for the entire journey, not just the uphill trail time. A reserved outward departure does not mean you can return whenever you want. Missing the final return service may leave you needing alternative transportation, which can be particularly complicated where mobile reception is absent.
When the parking or shuttle plan cannot support your intended route, consider a less-visited established trail with suitable terrain and scenery. Verify its access, restrictions and conditions independently rather than assuming that a quieter destination is necessarily safer or equally accessible.
Above all, do not compensate for an hour lost in traffic by rushing uphill, abandoning rest breaks or ignoring your turnaround time. Transport logistics are part of the mountain safety plan, not a separate inconvenience.
Before committing to your Canadian mountain day, write down the route, current conditions, access arrangements, turnaround deadline and backup destination. If any essential part of that plan cannot be confirmed, choose a simpler objective that still allows the group to return safely.
Can a physically fit beginner attempt a Canadian mountain summit?
Yes, provided the route is an appropriate non-technical hike, current conditions are suitable and the total elevation gain and descent fit the person’s actual capabilities. General fitness is useful, but it does not replace navigation ability, terrain awareness or experience with mountain weather. A shorter established trail with modest climbing is a better starting point than a steep exposed summit.
How can you tell whether a Canadian hiking route includes technical scrambling?
Look for descriptions mentioning scrambling, sustained use of hands, exposed ledges, loose gullies, route-finding or severe consequences of a slip. Verify the route’s official information and current conditions. A trail’s distance, elevation gain or popular hiking-app label cannot establish whether the final section requires technical skills. If the classification is unclear, seek qualified local advice or choose a documented hiking route.
What should you do if a group member becomes exhausted before the summit?
Stop in a safe location, assess their condition and make a conservative decision about turning around. Offer appropriate food, water, rest and protection from the weather if the person can safely take them. Do not pressure them to continue or leave an impaired person alone. Serious symptoms, an inability to travel safely or a suspected medical emergency require appropriate emergency assistance.
Do you need a satellite communicator for a Canadian mountain day hike?
Not every established day hike requires one, but a satellite emergency communicator can be an important additional safeguard where cellular service is unreliable. Choose a device suitable for the area, understand its limitations and know how to use it. It does not replace a shared trip plan, navigation equipment, sensible turnaround decisions or the ability to respond to changing conditions.
Should you cancel a mountain hike when rain or snow appears in the forecast?
Not every forecast of light rain requires cancellation, but the decision depends on temperature, wind, exposure, terrain, group experience and the severity and timing of the weather. Snow, freezing conditions, thunderstorms or significant exposure may make a summit unsuitable even when lower trails remain manageable. When uncertainty is high, select a lower, less exposed route or postpone the attempt.