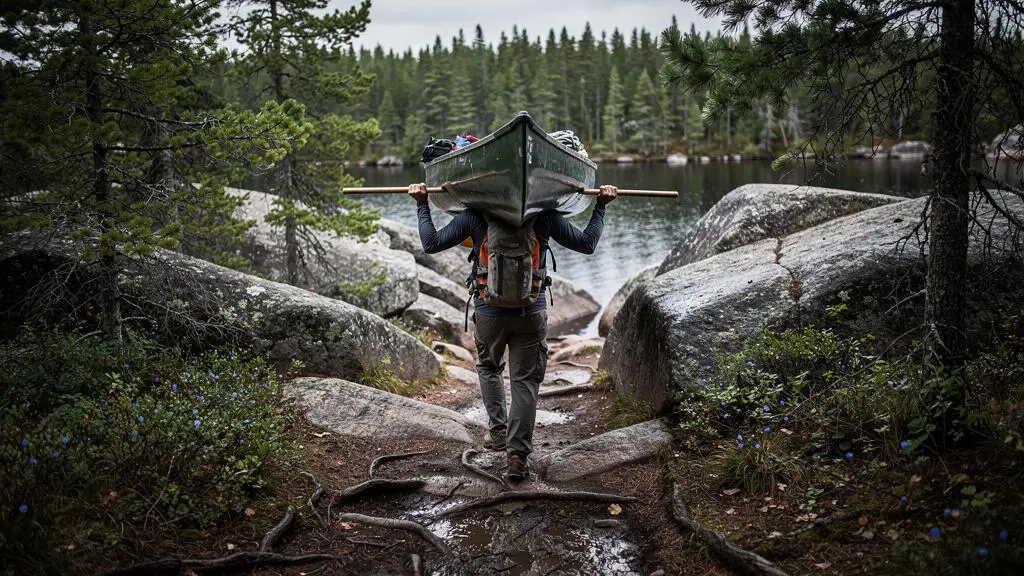
Your first Canadian Shield canoe trip should feel like an adventure, not a test of how much equipment you can carry through the forest. The challenge is that paddling between lakes is only part of the journey. Rocky landings, uneven portage trails, wind-exposed water and unfamiliar campsites can turn an apparently short route into a demanding expedition.
The easiest way to begin is to choose a protected lake system, limit the number of portages, rent suitable equipment and allow considerably more travel time than the map suggests. Algonquin Provincial Park, Killarney Provincial Park and the canoe-country regions of Northwestern Ontario offer different opportunities, but none should be approached as though every lake or access point has identical conditions.
A first trip can be as simple as one night on an interior campsite within comfortable reach of your starting point. That gives you space to learn how to handle a loaded canoe, organize a safe campsite and respond to changing weather before committing to a longer route.
Your first Canadian Shield canoe trip: the essentials
- Choose a short, sheltered route with manageable portages, confirmed camping arrangements and a realistic way to return to an access point.
- Test your actual paddling and carrying pace before estimating daily distances, and preserve time for wind, landings and unexpected delays.
- Rent appropriate tripping equipment, protect food from wildlife and plan around water temperature as carefully as insects or nighttime weather.
- Why Does a “10 km” Day in the Canadian Shield Take So Much Longer Than You Expect?
- How to Pick a Beginner Canoe Route in the Canadian Shield With Easy Bailout Options?
- Should You Rent or Bring Your Own Canoe for a Canadian Shield Trip?
- The Campsite Mistake in Shield Country That Attracts Wildlife Overnight
- When Should You Go to the Canadian Shield to Avoid Peak Bugs Without Risking Cold Nights?
- How to Plan an Island Kayak Route in Canada With Bailout Beaches Every 30 Minutes?
- Where Should You Go for Wild Space in Canada: National Parks, Provincial Parks, or Crown Land?
- Which “Wild Space” in Canada Will Actually Help You Unplug Without Going Full Backcountry?
Why Does a “10 km” Day in the Canadian Shield Take So Much Longer Than You Expect?
A 10 km canoe day in the Canadian Shield can take much longer than expected because the route involves more than paddling. Portages, loading and unloading, awkward landings, shoreline detours and wind all consume time. The useful measurement is not total distance alone, but how much water, land and equipment handling the journey requires.
On a cottage lake, distance often means paddling from one familiar shoreline to another. In Shield country, that same map distance may include several separate lakes connected by narrow trails.
Each transition interrupts the rhythm of travel. Paddlers must approach a suitable landing, secure the canoe, unload equipment, carry everything across the portage and reload at the next lake.
A portage marked as only a few hundred metres can therefore become a significant part of the day’s schedule.
Parks Canada’s Kejimkujik wilderness canoeing information provides a useful documented example outside the main Ontario destinations. Its 26 km Big Dam/Frozen Ocean route includes seven portages ranging from 130 to 800 metres. The park recommends allowing three days for a more relaxed trip, although two days may be possible.
Those figures describe a particular Nova Scotia route, not a universal Canadian Shield travel rate. They illustrate why route length alone tells an incomplete story.
7 portages
The 26 km Big Dam/Frozen Ocean route at Kejimkujik includes seven separate carries, showing why a route’s logistics matter alongside its distance.
Parks Canada — Kejimkujik wilderness canoeing information.
To build a more realistic schedule, separate your route into paddling sections and portage sections.
For each paddling section, estimate the distance you will actually travel rather than assuming a straight line across the map. Granite points, irregular bays and sheltered approaches can create substantial detours. A lake that appears compact on a small-scale map may require an unexpectedly long shoreline route.
For every portage, include the walking distance, expected number of equipment carries and the time needed to load and unload.
A group carrying its canoe and equipment in separate trips may walk the portage trail several times before everything reaches the next landing.
The most useful preparation is a short practical test.
Paddle a loaded canoe for one hour in safe, calm conditions and record the distance covered. Then complete a representative portage with your actual equipment, timing the entire operation from unloading to being ready to paddle again.
Use these measurements to estimate each section of your intended route. Add separate allowances for breaks, navigation, exposed water and group delays.
A calm-water test measures your baseline, not your guaranteed speed in wind or waves. If travelling with several boats, build the schedule around the slowest comfortable pace rather than the strongest paddler.
A manageable first day should leave enough daylight and energy to establish camp without rushing. Once you know your likely pace, choosing the right route becomes much easier.
How to Pick a Beginner Canoe Route in the Canadian Shield With Easy Bailout Options?
Choose a beginner canoe route with sheltered water, short and manageable portages, reachable campsites and a verified way to return to safety if conditions deteriorate. A bailout option is not simply a nearby shoreline: it is a practical route to an access point, road or arranged pickup that your group can actually use.
The simplest itinerary is often a short trip from one access point to a nearby interior campsite, with a flexible return schedule.
A loop can be attractive because it offers changing scenery, but it is not automatically safer than an out-and-back route. A loop with several unavoidable large-lake crossings may be less forgiving than a sheltered route with familiar return navigation.
Wind direction also changes. Neither route type guarantees a tailwind or protects you from difficult return conditions.
Before booking, compare candidate routes using four practical criteria.
| Route factor | Beginner-friendly characteristic | Potential complication |
|---|---|---|
| Daily distance | Comfortably below your tested capacity | Long mandatory travel days |
| Portages | Few, short carries with manageable terrain | Repeated long or steep carries |
| Lake exposure | Sheltered bays and shore-following options | Unavoidable open-water crossings |
| Route configuration | Flexible return or several feasible exit choices | A loop with no practical alternative exit |
| Camping | Confirmed, realistically reachable overnight locations | Long gaps between permitted campsites |
Next, audit each potential bailout. Mark road-accessible launch points, maintained access roads and any location where an outfitter has agreed to collect your group.
Verify whether pickup is possible during your trip, not merely at its scheduled end. Confirm access-road conditions, vehicle availability and whether a shoreline location genuinely connects to the road network.
For Ontario park trips, distinguish between reservation requirements and physical difficulty. A campsite booking or access-point permit does not establish that the paddling route is suitable for beginners.
A single exposed lake can control the difficulty of an otherwise short itinerary.
Five checks before committing to your first canoe route
- Mark the route. Produce a map showing every lake, portage, intended campsite and access point.
- Calculate travel time. Write a daily schedule using your tested paddling speed and actual equipment-carrying time.
- Identify exits. Create a marked list of feasible return points, with road or pickup arrangements verified.
- Confirm permissions. Save the applicable reservation confirmations, campsite rules and current access information.
- Prepare alternatives. Record a shorter itinerary, weather-related stopping points and an emergency communication plan.
Build flexibility into the itinerary rather than relying on a perfect forecast. Where reservations and camping rules permit, identify nearby alternatives that could shorten a day or allow you to stay put.
Do not assume you can relocate to any campsite or merge travel days without checking booking conditions.
Once the route is selected, choose equipment that makes its specific carries, crossings and access arrangements practical rather than unnecessarily exhausting.
Should You Rent or Bring Your Own Canoe for a Canadian Shield Trip?
Renting is usually the more practical choice for a first Canadian Shield canoe trip, especially when you do not already own a suitable tripping canoe. It allows you to test different hulls, avoid transportation and storage complications, and obtain equipment selected for local conditions. Bringing your own canoe makes sense when it is appropriately equipped and familiar.
The critical distinction is between a canoe designed for recreational outings on sheltered water and one suitable for travelling with overnight equipment.
A canoe that feels comfortable on an afternoon paddle may be awkward to lift repeatedly, difficult to carry or poorly suited to a loaded backcountry journey.
Check the hull’s condition and weight, the carrying yoke, appropriate flotation arrangements and the available space for securely packed gear.
A properly fitted yoke matters because carrying the boat should not depend on improvised pressure points or an unstable lifting position.
Before accepting a rental, ask the outfitter whether the specific canoe is intended for overnight portage routes, rather than assuming every boat in the fleet is interchangeable.
| Consideration | Renting | Bringing your own |
|---|---|---|
| Portage suitability | Choose a suitable tripping hull | Depends on your existing canoe |
| Transport | Delivery may be available | Requires appropriate vehicle transport |
| Equipment familiarity | Requires a rental inspection and trial | Familiar equipment may improve handling |
| Maintenance | Clarify the outfitter’s responsibilities | Owner handles inspection and repairs |
| Storage | No long-term storage needed | Secure storage required between trips |
Ask about paddle lengths, properly fitted personal flotation devices, spare equipment, rental damage terms and the procedure if equipment fails during the trip.
Also confirm whether delivery to the intended access point is included. Transporting a rental between the outfitter and the lake may require additional arrangements.
Buying becomes more attractive if you expect to paddle regularly, have suitable transportation and storage, and already understand which boat characteristics suit your trips.
There is also a middle ground. Some outfitters sell previously rented boats when updating their fleets, while certain accommodation-based experiences provide canoe access without requiring individual boat ownership.
A used rental still needs inspection for hull wear, structural damage and the condition of its carrying equipment.
Before leaving, practise lifting, lowering and carrying the canoe with assistance from an experienced instructor or outfitter. Never attempt an unstable solo lift merely because the canoe has a portage yoke.
A suitable canoe reduces avoidable fatigue, but equipment choice is only one part of the journey. The next important skill is keeping food and scented items away from the place you sleep.
The Campsite Mistake in Shield Country That Attracts Wildlife Overnight
The campsite mistake most worth avoiding is keeping food, cooking equipment contaminated with food, garbage or scented toiletries near your tent. These items can attract wildlife into the sleeping area. A safer camp separates sleeping, cooking and food storage, using the park’s approved storage arrangements rather than leaving supplies accessible overnight.
Ontario’s backcountry sites may be visited by black bears, raccoons, squirrels, mice and other animals looking for accessible food.
Even an animal that poses little direct physical danger can damage equipment, contaminate supplies or leave a group without enough food for the remainder of a trip.
It is therefore important to protect against small wildlife as well as bears. Reliable comparative encounter rates are not established by the supplied guidance, so there is no basis for assuming that one type of encounter is always more common.
The organization of the campsite makes prevention easier.
Begin by identifying a suitable sleeping area, a separate cooking location and a food-storage location that meets local rules. Avoid preparing meals inside the tent or carrying food bags into the sleeping area.
Ontario Parks’ backcountry food-storage advice recommends placing a food-hanging tree at least 100 metres from the sleeping area when hanging is appropriate. Its guidance also calls for food to hang from a branch at least 4 metres above the ground and at least 2 metres from the trunk.
These measurements are Ontario Parks guidance for suitable hanging arrangements, not a guarantee that every Shield campsite contains a usable tree.
Where designated metal lockers, bear-hang poles or cables are provided, follow the site’s instructions for using them.
Where no infrastructure is available, a tree hang may be appropriate if suitable trees exist and local rules permit that method. Otherwise, seek advice from park staff about acceptable alternatives before departure.
Storage should include more than obvious food packages. Toothpaste, sunscreen, insect repellent, deodorant, food-contaminated cookware and garbage also require attention.
Food scraps should be packed out rather than buried or burned. For Ontario provincial backcountry guidance, food particles are filtered from dishwater and packed out, while grey water is buried at least 20 cm deep and at least 30 metres from camp and water sources where that disposal method is permitted.
Other destinations may use different rules. In particular, do not assume that disposing of dishwater near a shoreline is acceptable merely because cooking takes place nearby.
Before travelling, ask park staff about current wildlife activity, applicable storage requirements and whether the reserved campsite has any dedicated storage infrastructure.
Good campsite habits reduce avoidable wildlife encounters. They also make evenings more organized, which matters when weather, insects or limited daylight complicate routine camp tasks.
When Should You Go to the Canadian Shield to Avoid Peak Bugs Without Risking Cold Nights?
There is no single Canadian Shield travel window that reliably eliminates insects while guaranteeing warm nights and safe water temperatures. Early-season trips can bring cold water and emerging blackflies, summer trips may have more mosquitoes, and autumn trips can mean fewer insects but colder conditions. Choose dates according to your group’s equipment, abilities and weather tolerance.
The first distinction is between blackflies and mosquitoes.
Blackflies are commonly associated with spring and early-summer conditions, while mosquito activity can remain important through warmer, wetter periods.
Their activity varies with local habitat and weather. A calendar date that works well in one Ontario region may be uncomfortable somewhere farther north.
Rather than treating the entire warm season as a single bug season, check recent local reports and ask an outfitter about conditions near your intended lakes.
Late summer and early autumn can be appealing for travellers who dislike insects. Some popular camping areas may also become quieter outside peak holiday periods, though this depends on the park, access point and reservation demand.
The trade-off is reduced daylight, potentially colder nights and water that may become dangerous during immersion.
Cold water deserves more attention than simply packing an extra sweater.
The Canadian Safe Boating Council’s cold-water safety information explains that cold shock and loss of effective movement can threaten a paddler before hypothermia becomes the main concern.
That is especially relevant when planning early- or late-season trips on remote lakes.
A properly worn lifejacket is essential, but it does not remove the effects of cold-water immersion. Appropriate thermal protection, the ability to reach safety and a realistic rescue plan remain necessary.
Instead of searching for a perfect month, match your equipment to the likely conditions.
- For insects: Pack a head net, protective clothing that covers exposed skin and suitable repellent used according to its instructions.
- For cool nights: Select a sleeping system suitable for the forecast overnight temperatures, with insulation from the ground.
- For cold water: Assess water temperature, immersion protection and rescue capability before deciding whether paddling is appropriate.
- For shorter days: Reduce planned travel distance and leave extra time to reach camp before darkness.
Avoid assuming that calmer weather or less crowded campsites make late-season paddling inherently safer. Wind and weather remain variable, and an unexpected capsize may have more serious consequences in colder water.
For a first trip, choose conditions that allow comfortable skill practice and conservative decision-making. A shorter, well-supported itinerary in manageable weather is preferable to a longer expedition selected only for the promise of fewer mosquitoes.
How to Plan an Island Kayak Route in Canada With Bailout Beaches Every 30 Minutes?
Plan an island kayaking route by identifying safe landing places before deciding where to paddle. A landing every 30 minutes can be a useful planning objective, but it is not an established safety rule. The acceptable gap depends on wind, waves, water temperature, paddler ability and whether the landing can actually be reached.
Island routes require a different assessment from sheltered canoe routes.
A shoreline that appears accessible on a map may be a granite cliff, steep rock face, marsh or exposed landing unsuitable for an emergency arrival.
An island may offer somewhere to wait for better conditions without providing a practical route to a road or pickup point.
That distinction matters: a temporary refuge is not necessarily an evacuation option.
Begin with a detailed map or chart that shows shorelines, islands, crossings and potential access points. Use additional local information to evaluate whether the mapped shorelines are genuinely landable.
Mark potential landing areas first. Then connect them with route segments that avoid unnecessary open-water exposure.
A crossing between two islands can be more hazardous than a longer journey following a protected shore. The key variables are exposure, conditions and the consequences if a paddler cannot complete the crossing.
The Canadian Safe Boating Council’s cold-water guidance is especially relevant here: cold shock and deteriorating physical capability can make an immersion emergency much more urgent than expected.
Do not interpret a theoretical 30-minute paddling interval as 30 minutes of guaranteed safety.
A practical mapping exercise follows this sequence:
- Identify possible landing locations using appropriate maps and reliable local knowledge.
- Check whether each shoreline appears physically landable and whether access is permitted.
- Identify exposed crossings and the wind conditions that could make them unsafe.
- Estimate travel times using the abilities of the least experienced paddler.
- Redesign any segment whose landing options are unsuitable for reasonably foreseeable adverse conditions.
Bring an appropriate communications method, carry safety equipment and ensure the group can perform the relevant kayak recovery and rescue techniques.
A beginner who has not practised recovering from a capsize should not depend on an exposed island crossing as part of a supposedly easy introduction.
Also verify that the intended route remains navigable without cellular coverage. A downloaded map is useful, but should not be the sole basis for emergency navigation.
Frequent landings can create flexibility, but only if they are genuinely usable. The next decision is choosing a destination whose rules, infrastructure and remoteness match your experience.
Where Should You Go for Wild Space in Canada: National Parks, Provincial Parks, or Crown Land?
For a first Canadian Shield paddling trip, an established provincial park route is often a practical starting point because designated access points, maintained portages and outfitter services may simplify planning. National parks can also offer structured wilderness experiences. Crown land provides greater independence in some locations, but requires more research into access, camping permissions and emergency preparedness.
The best choice depends on how much logistical responsibility your group is ready to manage.
Provincial parks such as Algonquin and Killarney offer recognized canoe-country experiences. Their reservation arrangements, campsite allocation systems, route maintenance and regulations differ, so specific plans must be checked with the managing park.
Canadian national parks operate under federal administration. Their backcountry opportunities and camping systems are not identical to those in provincial parks.
Crown land is different again. It is public land administered under applicable provincial rules, but it should not be treated as one enormous campsite with unrestricted access.
| Factor | National parks | Provincial parks | Crown land |
|---|---|---|---|
| Camping arrangements | Park-specific permits and designated areas | Park-specific reservations and designated areas | Subject to land-use rules and local restrictions |
| Route infrastructure | Varies by park | Established on many canoe routes | May be limited or absent |
| Information and support | Official park resources | Park staff, maps and local outfitters | Government land-use information and local research |
| Planning independence | Within park regulations | Within park regulations | Greater responsibility for checking access and conditions |
| First-trip suitability | Depends on the route | Often practical on suitable established routes | Best approached with stronger self-sufficiency |
Ontario’s official Crown land guidance states that recreational camping is generally permitted on much Crown land, subject to restrictions.
For private non-commercial camping, the general maximum stay is 21 days at one site in a calendar year, subject to applicable local conditions. Certain non-residents of Canada may also need a camping permit in specified areas north of the French and Mattawa Rivers.
These are Ontario-specific provisions, not rules applicable everywhere in Canada.
The government provides the Ontario government’s Crown land camping rules, including information about restrictions and the Crown Land Use Policy Atlas.
Before committing to a Crown land route, verify land classification, permitted activities, access rights, relevant fire restrictions and any additional local requirements. The supplied source was identified through indexed government information, but its complete live content could not be directly inspected, so current requirements should be reconfirmed.
Be attentive to private property, Indigenous lands and applicable permissions, protected areas, and resource operations that may affect access. A waterway shown on a map does not establish a legal right to cross adjacent private land.
Crown land routes may also lack maintained portages, obvious campsite locations and convenient assistance.
For someone new to carrying a canoe, these uncertainties add complexity without necessarily improving the quality of the first experience.
The most suitable destination is not necessarily the most remote. It is the one that offers the right balance between independence, safety and the experience you actually want.
Key takeaways before choosing your first escape
- Choose the level of remoteness that matches your current skills, not the level that sounds most adventurous.
- Confirm camping rules and access arrangements before relying on a quiet lake or isolated campsite.
- Use shorter trips to practise one unfamiliar backcountry skill at a time before combining several challenges.
Which “Wild Space” in Canada Will Actually Help You Unplug Without Going Full Backcountry?
A quiet lakeside campground or an easily accessible interior campsite can provide a meaningful escape without requiring a demanding portage expedition. The best option is somewhere you can spend time outdoors with limited distractions while retaining a level of support appropriate to your experience. Solitude does not have to mean isolation.
Think of disconnecting as a spectrum.
At one end is a drive-in campground with maintained facilities, convenient access and other campers nearby. At the other is a remote lake reached after multiple portages, where assistance may be difficult to obtain.
Between those extremes are quiet car-accessible lakes, paddle-in campsites and short overnight canoe trips.
Each offers a different balance of convenience and independence.
For someone living in a city and new to wilderness travel, a graduated approach is often more useful than booking the most isolated campsite available.
| Experience level | Trip style | Primary skill to practise |
|---|---|---|
| First outdoor overnight | Quiet, car-accessible lakeside camping | Camp organization and cooking outdoors |
| First interior experience | Short paddle to an appropriate overnight campsite | Loaded canoe handling, navigation and safe food storage |
| First portage journey | Short, established multi-lake route | Portaging and managing a flexible travel schedule |
This sequence lets each trip introduce a manageable new challenge.
On the first outing, practise organizing a tent, preparing food outdoors and packing equipment efficiently.
On the second, learn how a loaded boat behaves and how long it takes to establish camp without immediate vehicle access.
On the third, add a short portage and more demanding route planning, ideally with instruction or an experienced companion.
For actual disconnection, do not rely exclusively on cellular coverage maps. Granite terrain, forest cover and local topography may create inconsistent reception, and coverage data cannot guarantee service on a particular campsite.
Ask park staff or local outfitters about known reception limitations. Download essential navigation information, but carry an emergency communication solution appropriate to the trip and understand how to use it.
A lack of signal should be treated as a planning constraint, not a measure of wilderness quality.
If solitude is the goal, look beyond the most familiar access points. Compare campsite availability and permitted routes, consider quieter travel dates and choose locations that do not require an uncomfortable increase in physical difficulty.
Remember that popular routes can still provide an outdoor experience worth having. A scenic lake with other people nearby may be a better first destination than an isolated campsite whose approach exceeds your current abilities.
For your first Canadian Shield adventure, choose one manageable new challenge: perhaps a short portage, a night away from road access or cooking and storing food in an interior campsite. Confirm the route and reservations, practise with your equipment, and leave yourself room to change plans when conditions require it. A successful first trip builds the confidence to explore farther on the next one.
Can you try a Canadian Shield canoe trip without carrying a canoe on your shoulders?
Yes. Choose a suitable route that begins and ends on the same lake, with a permitted campsite reachable entirely by paddling. Confirm that the selected access point and campsite do not require an overland carry. This approach introduces overnight canoe travel without making portaging an essential first-trip skill.
Do you need a guide for your first overnight canoe trip?
A guide is not necessarily required, but instruction or an experienced companion can be valuable if your group lacks paddling, navigation, rescue or wilderness camping skills. A guided introduction is particularly useful when everyone is unfamiliar with handling a loaded canoe or responding to changing lake conditions.
What should you do if wind makes the next lake unsafe to cross?
Do not commit to an unsafe crossing. Remain at a safe, permitted location and wait for suitable conditions, or use a preplanned alternative where feasible. Allowing time for weather delays is a fundamental part of itinerary design. An inflexible schedule should never dictate a dangerous water crossing.
Is a phone enough for emergency communication in Ontario canoe country?
Do not assume a mobile phone will have service on remote lakes. Carry appropriate navigation and emergency communication equipment, consider a satellite-capable emergency device for remote travel, and leave a trip plan with a trusted contact. The level of preparation should reflect the route’s remoteness and your group’s ability to respond independently.
What should you do if you arrive at a portage and cannot safely carry the canoe?
Do not force an unsafe lift or carry. Assess whether the load can be reduced, whether assisted carrying is possible, and whether the terrain is within your capabilities. If it remains unsafe, use a viable alternative or return along a safe route. Practising portages beforehand helps prevent this situation from becoming an emergency.