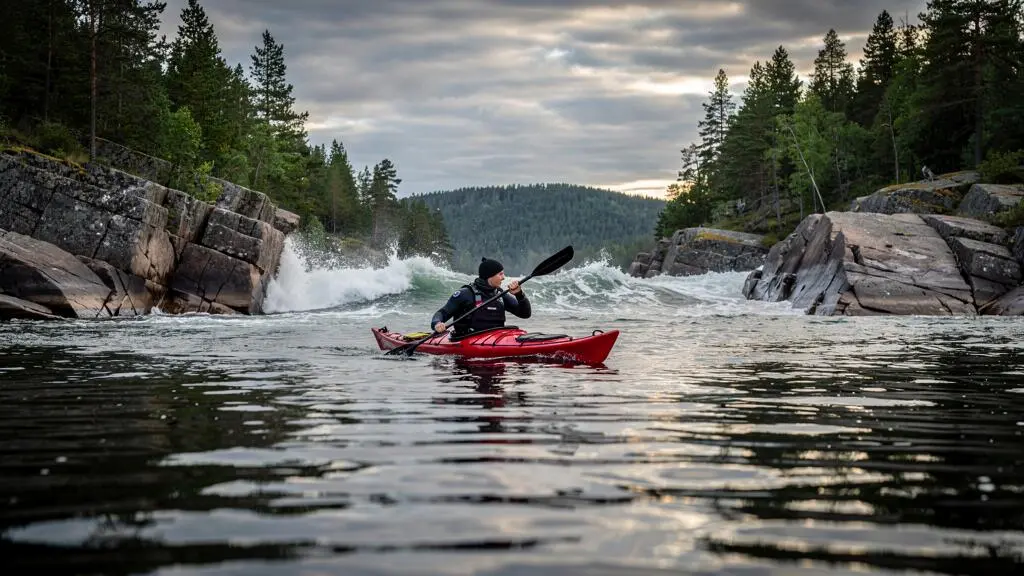
Kayaking between forested Canadian islands can feel wonderfully sheltered until a narrow channel suddenly exposes you to strong wind and steep, confused waves. In places such as Georgian Bay, British Columbia’s Gulf Islands, and remote coastal inlets, the difference between comfortable paddling and a difficult crossing may be only one headland away.
The safest approach is not simply to paddle harder when the wind rises. It is to understand how islands influence wind, identify usable landing sites before launching, wear clothing suitable for immersion, and decide when a crossing is no longer worth attempting.
These decisions matter especially for beginner-to-intermediate paddlers. A route that looks short on a map may include exposed water, limited landing opportunities, cold-water hazards, or tidal currents. Wind forecasts provide useful guidance, but an island itinerary must also account for local conditions and the group’s actual rescue abilities.
A practical trip plan therefore includes an alternative: somewhere safe to land, a sheltered route back, or the willingness to postpone departure entirely.
Essential rules for safer Canadian island kayaking
- Expect wind conditions to change between sheltered coves, narrow channels, and exposed headlands. Assess each crossing separately.
- Identify physically usable and legally accessible landing points before departure, and shorten the distance between alternatives when conditions deteriorate.
- Dress for cold-water immersion, wear an appropriate flotation device, and practise assisted rescue before attempting exposed island routes.
- Why Does Island-Hopping Kayaking Feel Calm One Minute and Sketchy the Next?
- How to Plan an Island Kayak Route in Canada With Bailout Beaches Every 30 Minutes?
- Should You Go Guided or Self-Guided for Island Kayaking in Canada If You’re Not Expert?
- The Cold-Water Clothing Mistake That Turns a Kayak Tip-Over Into an Emergency
- When Is the Best Time of Day for Island Crossings in Canada to Avoid Afternoon Wind?
- How to Pick a Beginner Canoe Route in the Canadian Shield With Easy Bailout Options?
- How to Check Frozen Lake Safety in Canada Using a Simple 6-Step Checklist?
- How to Plan a Canadian Shield Lakes Trip When You’ve Never Done a Portage?
Why Does Island-Hopping Kayaking Feel Calm One Minute and Sketchy the Next?
Island-hopping conditions can change abruptly because islands redirect and shelter the wind. A protected bay may feel nearly calm while an adjacent channel funnels stronger air currents toward your kayak. Exposed headlands, reflected waves, and shifting local winds can make a short crossing substantially harder than the distance suggests.
Imagine paddling along the sheltered side of a pine-covered island in Georgian Bay. The water feels smooth, and conversation is easy. As the kayak rounds a rocky point, the shelter disappears. Wind now reaches the hull directly, small waves strike from an angle, and keeping the boat on course requires much more attention.
Three terrain effects help explain these changes:
- Wind shadows: islands and wooded shorelines shelter water on their downwind side, sometimes producing deceptively calm patches.
- Channel acceleration: local topography can concentrate airflow through gaps, although the effect varies with wind direction and terrain.
- Wave interaction: short wind-driven waves may reflect from steep rock faces, creating irregular motion that is difficult for inexperienced paddlers to anticipate.
Daytime heating adds another variable. The National Weather Service definition of a sea breeze explains how temperature differences between warmer land and cooler water can generate daytime onshore winds. Similar lake-breeze processes can develop around Canadian lakes.
However, the strength and timing of these winds depend on atmospheric conditions. A calm morning does not guarantee either a windy afternoon or continued calm.
On the water, observe the surface ahead rather than relying only on the conditions immediately beside the kayak. Small dark rippled patches, sometimes called cat’s paws, indicate wind touching previously smooth water. Persistent whitecaps suggest more energetic conditions, but their appearance also depends on fetch, waves, and current.
A paddle can also serve as a qualitative wind indicator: if raising the blade while stationary makes it difficult to hold steady, exposed travel deserves reassessment. This is not a calibrated wind-speed test, and deliberately leaning into a gust can destabilize the kayak.
The key distinction is between wind that merely slows progress and wind that compromises steering, stability, rescue capability, or the ability to reach a safe landing. When those abilities are in doubt, retreat while sheltered water remains accessible.
How to Plan an Island Kayak Route in Canada With Bailout Beaches Every 30 Minutes?
Plan island routes around verified landing opportunities rather than assuming that a beach every 30 minutes guarantees safety. That interval can be a useful planning hypothesis, but actual access depends on wind, waves, current, group speed, and shoreline conditions. A landing must be both safe to approach and permitted to use.
Begin with a nautical chart or suitable lake map and identify the exposed portions of the proposed route. Mark candidate landing places on each side of a crossing, including alternatives that remain reachable if wind direction changes.
A genuinely useful landing site has several characteristics:
- An approach that avoids breaking waves, dangerous shallows, or offshore rocks.
- Enough space to bring boats ashore without being pushed into a cliff or steep shoreline.
- Protection from the likely wind and wave direction.
- Legal access, with any relevant park, reserve, or private-land restrictions checked beforehand.
A sandy beach is not automatically safer than a gravel or cobble shore. Sand may offer comfortable landing in calm water but become an active surf zone in onshore wind. A sheltered gravel landing may be preferable, provided its underwater rocks and approach are manageable.
To test the 30-minute idea, use the group’s demonstrated paddling speed in comparable conditions, not an optimistic estimate from calm-water outings. Consider how much progress deteriorates against a headwind and whether the group could still reach the landing after someone becomes fatigued.
For a hypothetical example, a group that covers a sheltered section comfortably in half an hour may need considerably longer after turning into wind. That change can make the original landing interval unsuitable. Rather than relying on one fixed number, select shorter, more sheltered legs as uncertainty increases.
Canadian protected areas require additional attention. In Gwaii Haanas, for example, independent visitors must satisfy reservation and orientation requirements. Parks Canada also warns about rapidly changing weather, currents, and hazardous passages, while recommending flexible itineraries and appropriate charts. These details appear in Parks Canada’s Gwaii Haanas trip-planning information.
That destination illustrates why a route planner cannot assume every island shoreline is available for routine landing or camping. Verify local access rules separately for Georgian Bay parks, British Columbia marine parks, and other protected shorelines. Emergency circumstances are different from ordinary recreational access, but they should never be treated as a substitute for advance planning.
Five checks to complete before launching
- Mark the intended route and exposed crossings on a suitable chart; save a copy available offline.
- Identify candidate landings and their approach hazards; produce a marked list of primary and alternative landing points.
- Check park rules, permissions, and campsite requirements; record any unavailable locations directly on the route map.
- Review wind, wave, and current forecasts against the group’s proven capabilities; record a departure decision and reassessment points.
- Prepare a trip plan containing the route, group details, emergency communications, and overdue-contact procedure; leave it with a reliable person ashore.
At each sheltered stopping point, decide whether the next leg remains acceptable. Treat exposed crossings as separate decisions, with the option to turn back before committing.
A reliable plan does not require reaching every island on the original itinerary. It requires knowing which crossings can be skipped and having a credible alternative when the conditions no longer match the group’s abilities.
Should You Go Guided or Self-Guided for Island Kayaking in Canada If You’re Not Expert?
Choose a guided trip when your ability to interpret changing weather, perform cold-water rescues, or navigate the destination is uncertain. Self-guided paddling is more reasonable when the entire group has demonstrated the necessary skills and knows the local hazards. Strong paddling fitness alone is not enough for unfamiliar island or tidal waters.
Evaluate your readiness using three separate questions: Can you recognize when conditions are deteriorating? Can your group recover from a capsize in the expected water and waves? Can you navigate the location accurately when landmarks become confusing or visibility declines?
The following decision grid helps distinguish a manageable independent outing from one that deserves professional support.
| Decision factor | Guided trip is preferable | Self-guided may be reasonable |
|---|---|---|
| Weather judgement | Limited experience interpreting marine forecasts and local wind changes | Demonstrated ability to assess and respond to changing conditions |
| Capsize recovery | Assisted rescue and re-entry skills are untested in relevant conditions | All paddlers can perform appropriate rescues with their equipment |
| Local knowledge | Unfamiliar tidal streams, reefs, channels, or landing restrictions | Current charts, local information, and a carefully assessed route |
| Trip flexibility | Little experience changing plans during deteriorating weather | Established turnaround criteria and realistic alternatives |
A guide also contributes knowledge that is difficult to extract from a weather application. Local professionals may recognize exposed headlands, troublesome shoals, tidal timing, or more sheltered alternatives. Their knowledge can help explain discrepancies between broad regional forecasts and the conditions encountered around specific islands.
However, a guide does not eliminate weather or immersion risks. Ask prospective operators about guide qualifications, group size, rescue training, equipment, weather cancellation procedures, and the conditions in which they will modify or abandon a route.
Cost comparisons should consider more than the advertised trip price. A self-guided outing may require a suitable kayak, immersion clothing, communication equipment, navigation tools, transportation, and instruction. A guided package may include some of these elements, though inclusions vary.
Rather than assuming that one option is always cheaper, compare written quotations for equivalent trip duration, equipment, training, and logistical support. For a first outing, a paddling course followed by a guided island trip can be a sensible progression.
Local access requirements must also be checked. Gwaii Haanas, for instance, permits independent kayaking subject to its visitor requirements; a certified guide is not universally compulsory there. Rules for other protected destinations may differ.
The best choice is the one that matches the group’s least experienced participant, the destination’s hazards, and the rescue capabilities actually available—not simply the confidence of the strongest paddler.
The Cold-Water Clothing Mistake That Turns a Kayak Tip-Over Into an Emergency
The critical clothing mistake is dressing for warm air rather than cold water. Cotton clothing, lightweight summer outfits, and ordinary waterproof jackets may leave paddlers dangerously exposed after a capsize. On Canadian lakes and coasts, immersion conditions can be cold even when the weather feels comfortable, so thermal protection must reflect the water and the expected rescue scenario.
Cold-water immersion can trigger an involuntary gasp, rapid breathing, reduced muscular performance, and declining coordination. Wind and waves make these effects harder to manage because the paddler must simultaneously control breathing, maintain flotation, and recover the kayak.
Transport Canada explains these hazards in its advice on lifejackets and personal flotation devices. Canadian boating rules generally require an approved lifejacket or personal flotation device for each person aboard, including in human-powered watercraft. Wearing a properly fitted device throughout the outing is strongly recommended.
Thermal clothing adds a separate layer of protection that a standard PFD does not provide.
Wetsuits and drysuits solve different problems. A properly fitted wetsuit provides insulation through neoprene and can be appropriate for particular water temperatures and immersion scenarios. Its effectiveness depends on fit, coverage, thickness, and conditions.
A drysuit is designed to limit water entry and allows suitable insulating layers underneath. For colder, longer, or more exposed trips, it may provide a more appropriate clothing system, provided the seals, fit, insulation, and equipment are suitable.
Neither garment is a substitute for a PFD, rescue training, or a conservative route. A drysuit without sufficient insulation does not automatically make immersion safe.
Consider a hypothetical capsize near an exposed island point. Wind separates the paddler from the kayak. Cold shock interferes with breathing, while waves complicate assisted rescue. Even if the shoreline looks close, rocks and breaking water may prevent a straightforward landing.
That sequence explains why clothing and route planning must be considered together. The more difficult an immediate rescue would be, the more consequential the immersion-protection decision becomes.
Before departure, consider whether your clothing would protect you during an unexpected swim in the actual water. A hypothetical 15-minute immersion is a useful reminder to think beyond an instantaneous splash, but it is not a validated safety standard or a recommended unsupervised test. Do not deliberately enter cold water to establish your tolerance.
Instead, obtain appropriate professional advice, assess the water conditions, and practise rescues in a controlled environment with qualified supervision and suitable thermal protection.
Cold-water preparation is not about choosing the most expensive garment. It is about selecting a coherent system that gives you a realistic chance of remaining functional until rescue and recovery are complete.
When Is the Best Time of Day for Island Crossings in Canada to Avoid Afternoon Wind?
Morning can offer a favourable crossing window when daytime heating is expected to strengthen onshore or lake-breeze winds later in the day. However, this pattern is not universal. Frontal systems and persistent regional winds can produce rough conditions at dawn, so departure timing must follow the actual marine or lake forecast.
On suitable days, cooler overnight conditions leave relatively weak local thermal circulation early in the morning. As land warms, temperature differences between land and water can generate or strengthen daytime breezes.
For paddlers, the practical implication is straightforward: a morning crossing may be easier than returning across the same water in late afternoon. But choosing an early start without reviewing the broader weather system can create false confidence.
Distinguish thermal winds from larger-scale weather. A local lake breeze may build with daytime heating, while winds associated with a low-pressure system or approaching front can develop at another time altogether.
Use the forecast to structure your day:
- Review the forecast for the entire travel period, including the intended return.
- Identify the most exposed crossing and its available retreat options.
- Check whether conditions are expected to improve, deteriorate, or remain variable.
- Schedule exposed travel only within an appropriate forecast window for your group’s skill level.
- Reserve sheltered paddling, shoreline exploration, or rest for periods when exposed water is less favourable.
For British Columbia coastal trips and the Great Lakes, Environment and Climate Change Canada‘s marine forecasts are particularly relevant because they address conditions over marine waters rather than simply describing weather in a nearby town.
For inland lakes without a dedicated marine forecast, consult the most relevant official forecasts and local observations available. Consider exposed shorelines, fetch, wind direction, and how the proposed crossing differs from sheltered areas.
Also plan around the return journey. A tailwind during the outward crossing may create a difficult headwind later, particularly if fatigue has accumulated.
There is no universal departure hour that makes Canadian island crossings safe. The correct window is determined by expected conditions, current observations, daylight, local hazards, and rescue capability.
If the most exposed crossing is only acceptable under unusually favourable conditions, build the trip around the possibility of not making it. An optional crossing is easier to cancel than an unavoidable return from an exposed destination.
How to Pick a Beginner Canoe Route in the Canadian Shield With Easy Bailout Options?
Choose a beginner Canadian Shield canoe route with short lake sections, manageable portages, flexible campsites, and verified exits before the final destination. The same retreat principle used for island kayaking applies, but canoe routes often allow land-based alternatives. An easy-looking chain of lakes is unsuitable for beginners if the only exit is at the far end.
The Canadian Shield offers sheltered waterways, rocky shorelines, and interconnected lakes, but the terrain creates particular navigation and emergency-planning challenges. Submerged rocks can damage boats, wind can make open lake sections difficult, and remote portages may be physically demanding.
Limited communication coverage compounds those hazards. A mechanical problem or minor injury may prevent a group from following its planned schedule, especially when there is no nearby road access.
A useful beginner route should provide several advantages:
- Short, connected lake sections that avoid committing inexperienced paddlers to long exposed crossings.
- Documented portages with manageable terrain and clear access points.
- Campsites that allow a shorter or longer daily itinerary without forcing excessive travel.
- Verified road or access-point connections that could support an early exit or pickup.
- Maps showing alternative routes and a realistic way to return to the starting point.
Distinguish between a true exit and a feature that merely looks accessible on the map. A logging road may be closed, gated, privately controlled, or unsuitable for vehicle pickup. A shoreline near a road may have no practical route between the water and the road.
Confirm the status of every proposed exit through the appropriate park authority, land manager, or local outfitter. Where a car shuttle is required, arrange it before departure rather than assuming transportation will be available.
Established park routes can offer clearer information than little-documented backcountry travel, but established does not necessarily mean easy. Review terrain, portage conditions, distance, water exposure, and seasonal restrictions.
The same applies to communications. Check available coverage information while recognizing that coverage maps are imperfect. For remote outings, consider suitable emergency communication equipment and ensure someone ashore has an actionable trip plan.
A genuinely beginner-friendly route offers room for slower progress, changing weather, and early departure. Its flexibility matters more than how impressive the destination appears in a brochure.
How to Check Frozen Lake Safety in Canada Using a Simple 6-Step Checklist?
Checking frozen-lake safety requires more than measuring ice once or judging its appearance. Verify local warnings, assess the intended activity, examine ice quality, identify current and weak-ice hazards, confirm thickness at relevant locations, and prepare for emergencies. No six-step checklist can certify that natural ice is safe, especially where conditions vary across a lake.
Winter ice assessment follows the same decision-making principle as summer wind planning: conditions can change over short distances, and a convenient route is not necessarily a safe one.
These six checks form a practical screening process, not a validated guarantee of safe travel.
- Check local notices. Look for park closures, warnings, recent weather changes, and reports from relevant authorities. Do not enter closed or unassessed areas merely because the surface appears frozen.
- Identify the activity. Walking, skating, group activities, and motorized travel place different demands on ice. Use activity-specific official guidance rather than applying a figure intended for another activity.
- Examine ice quality. Clear blue ice is generally stronger than white opaque ice. Grey ice is considered unsafe. Colour alone does not establish load-bearing strength.
- Locate weak areas. Avoid inlets, outlets, current channels, pressure ridges, and places where water may move beneath the ice. Springs and beaver-related waterways deserve particular caution.
- Verify thickness and variation. Assessment requires appropriate methods, experience, and multiple locations. One measurement cannot establish the condition of an entire lake. When reliable assessment is unavailable, stay off.
- Prepare for a rescue emergency. Travel with a partner, carry suitable rescue equipment, inform someone of the route, and understand that attempting an untrained rescue can place additional people in danger.
Parks Canada’s guidance on activities on frozen water bodies, published for Riding Mountain National Park, summarizes Canadian Red Cross recommendations and warns about changing ice conditions.
15 cm / 20 cm
Parks Canada’s published guidance recommends 15 cm for walking or skating alone and 20 cm for skating parties or games. These are activity-specific recommendations, not universal safety guarantees.
Parks Canada, Activities on frozen water bodies, incorporating Canadian Red Cross ice-safety guidance.
These measurements should not be extended automatically to snowmobiles or other heavier activities. Ice thickness is only one factor, and snow cover can conceal hazards while insulating ice and affecting its growth.
Canadian Shield lakes may contain underwater springs, narrow current channels, and irregular shorelines. This means apparently similar areas can differ in strength even over relatively short distances.
Ice picks and rescue rope are useful precautions, but equipment cannot compensate for uncertain ice conditions. In remote winter settings, the consequences of a breakthrough can be severe.
When conditions cannot be adequately confirmed, the safe decision is to avoid entering the ice and choose an established alternative. Uncertainty should trigger a change of plan rather than a search for reassuring appearances.
What to carry into your first Canadian Shield trip
- Choose a route that can be shortened or abandoned without forcing an exposed crossing or an inaccessible portage.
- Test unfamiliar skills and equipment before the trip, especially carrying a canoe and managing loaded boats.
- Keep daily objectives modest enough to accommodate weather delays, fatigue, and unexpected trail conditions.
How to Plan a Canadian Shield Lakes Trip When You’ve Never Done a Portage?
For your first Canadian Shield portage trip, choose an established route with short carries, manageable lake crossings, and a practical early-exit option. Practise lifting and carrying the canoe before departure, reduce unnecessary equipment, and plan conservative daily distances. The aim is to learn the process without making one difficult carry determine the success of the entire trip.
A portage is a land crossing where a canoe and its equipment must be moved between bodies of water or around an obstacle. Depending on the route, it may involve unloading at a landing, carrying gear along a trail, transporting the canoe, and relaunching on the other side.
For someone who has never portaged, the main uncertainty is often physical rather than navigational. Carrying a canoe over uneven ground feels very different from paddling it. Roots, slippery rock, elevation changes, and poorly maintained trails can make even a short portage challenging.
Start with routes documented by established park systems or other reliable land managers. Seek maintained trails and short transfers between lakes rather than a demanding wilderness itinerary with one long, unavoidable carry.
Before selecting the trip, practise on dry land with the actual canoe and equipment. Learn a safe lifting technique, ideally through qualified instruction or an experienced partner, and assess whether the group can carry the load without injury.
There is no universal time requirement for a beginner portage. Duration depends on trail distance, terrain, loads, how many trips are needed, and the paddlers’ experience. Plan for loading, unloading, breaks, and possible repeated carries rather than relying only on the trail’s mapped distance.
Packing discipline makes a major difference. Every unnecessary item must be carried, sometimes more than once. Organize equipment into a limited number of secure, manageable loads instead of many small loose bags.
Waterproof appropriately, distribute weight according to each person’s capacity, and keep essential safety equipment accessible. Do not combine loads simply to reduce the number of trips if doing so makes lifting unsafe or compromises balance.
For a hypothetical first outing, consider a short lake chain with one modest portage, an established campsite, and a return option on the first day. If the carry takes longer than expected, the group can shorten the itinerary rather than pushing onward to meet a distant campsite reservation.
Before launching, confirm the relevant access rules, campsite arrangements, route restrictions, and any required permits. Mark the first-day turnaround point and agree on what conditions will trigger an early return.
For your next step, select one short, documented route, practise carrying your canoe with its intended load, and review the entire journey with your paddling partner. A successful first trip is one that builds skills while leaving sufficient flexibility to finish safely.
Can beginners kayak between islands in Georgian Bay?
Beginners can explore suitable sheltered routes, preferably with instruction or an experienced guide. However, Georgian Bay contains exposed water and rocky coastlines, so the presence of nearby islands does not automatically make a route beginner-friendly. Choose a short itinerary, assess wind exposure, identify safe landings, and avoid crossings beyond the group’s proven abilities.
Is a phone with an offline map enough for island kayaking?
No. Offline maps are useful navigation aids but do not replace suitable charts, compass skills, local hazard information, and reliable emergency planning. Phones can fail because of water exposure, battery problems, or poor reception. On remote coastal trips, consider an appropriate marine VHF radio or other emergency communications equipment, with the skills to use it correctly.
What should you do when whitecaps appear ahead of your kayak?
Reassess before entering exposed water. Consider wave direction, the available landing options, current conditions, and the abilities of every paddler. If the conditions exceed the group’s skills, remain sheltered or retreat while it is still feasible. Whitecaps are a warning sign, not a precise wind-speed measurement or an automatic indication that every route is unsafe.
Does a kayak PFD protect you from cold-water shock?
A properly fitted PFD supports flotation but does not necessarily provide adequate thermal protection. Cold-water immersion can still affect breathing, coordination, and strength. Suitable immersion clothing, rescue skills, conservative route choices, and an appropriate flotation device must work together.
Should a first-time island kayaker plan an overnight trip?
A sheltered day trip is generally a more manageable starting point. Overnight travel adds camping equipment, weather exposure, route commitments, and potentially more demanding rescue arrangements. Before attempting a multi-day journey, develop navigation and rescue skills, gain experience with loaded kayaks, confirm legal campsites, and establish contingency plans for weather delays.